Difference between revisions of "Abyssal King"
| (6 intermediate revisions by the same user not shown) | |||
| Line 1: | Line 1: | ||
== Boss == | == Boss == | ||
| − | <i>To go back to bosses page, [[Bosses|click here]]</i> | + | <i>To go back to bosses page, [[Bosses List|click here]]</i> |
<hr> | <hr> | ||
| − | [[File:Abyssal King.gif]] | + | [[File:Abyssal King.gif|link=]] |
<b>Boss Info</b><br> | <b>Boss Info</b><br> | ||
| − | [[file:Bosstiary Archfoe.png]] Classification: Archfoe<br> | + | [[file:Bosstiary Archfoe.png|link=]] Classification: Archfoe<br> |
| − | [[file:Speed Icon.gif]] Location: Lost Mountain Abyssal<br> | + | [[file:Speed Icon.gif|link=]] Location: Lost Mountain Abyssal<br> |
| − | [[File:HP Icon.gif]] Health: 6kk<br> | + | [[File:HP Icon.gif|link=]] Health: 6kk<br> |
| − | [[File:XP Icon.gif]] Experience: 12.5kk<br> | + | [[File:XP Icon.gif|link=]] Experience: 12.5kk<br> |
<b>Bosstiary Progress</b><br> | <b>Bosstiary Progress</b><br> | ||
| − | [[file:Prowess Icon.gif]] Prowess: 5 kills<br> | + | [[file:Prowess Icon.gif|link=]] Prowess: 5 kills<br> |
| − | [[file:Expertise Icon.gif]] Expertise: 20 kills<br> | + | [[file:Expertise Icon.gif|link=]] Expertise: 20 kills<br> |
| − | [[file:Mastery Icon.gif]] Mastery: 40 kills<br> | + | [[file:Mastery Icon.gif|link=]] Mastery: 40 kills<br> |
== Loot Table == | == Loot Table == | ||
| + | |||
<table class="wikitable sortable"> | <table class="wikitable sortable"> | ||
| − | |||
| − | |||
| − | |||
| − | |||
| − | |||
| − | |||
| − | |||
| − | |||
| − | |||
| − | |||
| − | |||
| − | |||
| − | |||
| − | |||
| − | |||
| − | |||
| − | |||
| − | |||
| − | |||
| − | |||
| − | |||
| − | |||
| − | |||
| − | |||
| − | |||
| − | |||
| − | |||
| − | |||
| − | |||
| − | |||
<tr> | <tr> | ||
| − | <td align=" | + | <td align="left" valign="top"> |
| − | + | <center>'''[[Items|Boss Items]]'''</center> | |
| − | + | [[File:Boss Coin2.gif|link=]] [[Boss Coin Shop|1-4x boss coin]]<br> | |
| − | + | [[File:Relic Chest.gif|link=]] [[Relics#Relic_List|relic chest]] | |
| − | + | [[File:Attunement Item 3.gif|alt=]] [[Soul Attunement|soul of abyssal king]] | |
| − | |||
| − | |||
| − | |||
| − | |||
| − | + | [[File:Abyssal Helmet2.gif|alt=]] [[Helmets|abyssal helmet]] | |
| − | |||
| − | |||
| − | |||
| − | |||
| − | |||
| − | |||
| − | |||
| − | |||
| − | |||
| − | |||
| − | + | [[File:Jade Conical Hat.gif|alt=]] [[Helmets|jade conical hat]] | |
| − | |||
| − | |||
| − | |||
| − | |||
| − | + | [[File:Abyssal Plate2.gif|alt=]] [[Armors|abyssal plate]] | |
| − | |||
| − | |||
| − | |||
| − | |||
| − | + | [[File:Abyssal Legs2.gif|alt=]] [[Legs|abyssal legs]] | |
| − | |||
| − | |||
| − | |||
| − | |||
| − | |||
| − | |||
| − | |||
| − | |||
| − | |||
| − | |||
| − | |||
| − | |||
| − | |||
| − | |||
| − | |||
| − | |||
| − | |||
| − | |||
| − | |||
| − | |||
| − | |||
| − | |||
| − | |||
| − | |||
| − | |||
| − | |||
| − | |||
| − | |||
| − | |||
| − | |||
| − | |||
| − | |||
| − | |||
| − | |||
| − | |||
| − | |||
| − | |||
| − | |||
| − | |||
| − | |||
| − | |||
| − | |||
| − | |||
| − | |||
| − | |||
| − | |||
| − | |||
| − | |||
| − | |||
| − | |||
| − | |||
| − | |||
| − | |||
| − | |||
| − | |||
| − | |||
| − | |||
| − | |||
| − | + | [[File:Abyssal Boots2.gif|alt=]] [[Boots|abyssal boots]] | |
| − | |||
| − | |||
| − | |||
| − | |||
| − | + | [[File:Eldritch Monk Boots.gif|alt=]] [[Boots|eldritch monk boots]]<br>[[File:Abyssal Basher2.gif|alt=]] [[Shields|abyssal basher]] | |
| − | |||
| − | |||
| − | |||
| − | |||
| − | + | [[File:Abyssal Necklace2.gif|alt=]] [[Amulets|abyssal necklace]] | |
| − | |||
| − | |||
| − | |||
| − | |||
| − | + | [[File:Abyssal Ring2.gif|alt=]] [[Rings|abyssal ring]] | |
| − | |||
| − | |||
| − | |||
| − | |||
| − | + | [[File:Abyssal Treasure2.gif|alt=]] [[Extra Slot|abyssal treasure]] | |
| − | + | </td> | |
| − | <td align=" | + | <td align="left" valign="top"> |
| − | < | + | <center>'''[[Jewelry]]'''</center> |
| − | + | [[File:Crystal Coin.gif|link=]] 3-6x crystal coin | |
| − | + | [[File:Giant Amethyst.gif|link=]]giant amethyst<br> | |
| − | + | [[File:Giant Ruby.gif|link=]] 1-2x giant ruby | |
| − | |||
| − | |||
| − | |||
| − | + | [[File:Giant Emerald.gif|link=]]1-2x giant emerald | |
| − | |||
| − | |||
| − | |||
| − | |||
| − | + | [[File:Giant Topaz.gif|link=]]1-2x giant topaz | |
| − | |||
| − | |||
| − | |||
| − | |||
| − | < | + | [[File:Giant Sapphire.gif|link=]]giant sapphire |
| − | <td align="center | + | </td> |
| − | < | + | <td align="left" valign="top"> |
| − | < | + | <center>'''[[Liquids]]'''</center> |
| + | [[File:Ultimate Mana Potion.gif|link=]] 1-16x ultimate mana potion<br> | ||
| + | [[File:Ultimate Spirit Potion.gif|link=]] 1-16x ultimate spirit potion<br> | ||
| + | [[File:Supreme Health Potion.gif|link=]] 1-16x supreme health potion<br> | ||
| + | [[File:Mastermind Potion.gif|link=]] 1-5x mastermind potion<br> | ||
| + | [[File:Bullseye Potion.gif|link=]] 1-5x bullseye potion<br> | ||
| + | [[File:Berserk Potion.gif|link=]] 2-5x berserk potion | ||
| + | </td> | ||
</tr> | </tr> | ||
| − | |||
<tr> | <tr> | ||
| − | <td align="center | + | <td align="left" valign="top"> |
| − | + | <center>[[Gem Atelier|'''Gems''']] | |
| − | + | [[File:Lesser Marksman Gem.gif|link=]][[File:Lesser Mystic Gem.gif|link=]][[File:Lesser Sage Gem.gif|link=]][[File:Lesser Guardian Gem.gif|link=]][[File:Lesser Spiritualist Gem.gif|link=]][[File:Lesser Ninja Gem.gif|link=]] | |
| − | |||
| − | + | [[File:Marksman Gem.gif|link=]][[File:Mystic Gem.gif|link=]][[File:Sage Gem.gif|link=]][[File:Guardian Gem.gif|link=]][[File:Spiritualist Gem.gif|alt=]][[File:Ninja Gem.gif|link=]] | |
| − | |||
| − | |||
| − | |||
| − | |||
| − | + | [[File:Greater Marksman Gem.gif|link=]][[File:Greater Mystic Gem.gif|link=]][[File:Greater Sage Gem.gif|link=]][[File:Greater Guardian Gem.gif|link=]][[File:Greater Spiritualist Gem.gif|alt=]][[File:Greater Ninja Gem.gif|link=]] | |
| − | + | </center> | |
| − | + | </td> | |
| − | <td align=" | + | <td align="left" valign="top"> |
| − | + | <center>[[Pet Upgrading#Boosts|'''Pet Boost Tokens''']] | |
| + | [[File:petice.gif|link=]][[File:petdeath.gif|link=]][[File:petholy.gif|link=]][[File:petfire.gif|link=]][[File:petenergy.gif|link=]][[File:petearth.gif|link=]] | ||
| − | + | [[File:petphysical.gif|link=]][[File:petdistance.gif|link=]][[File:petmagic.gif|link=]][[File:petdmg.gif|link=]][[File:petmelee.gif|link=]]</center> | |
| − | + | </td> | |
| − | + | <td align="left" valign="top"></td> | |
| − | <td align=" | ||
</tr> | </tr> | ||
| − | |||
| − | |||
| − | |||
| − | |||
| − | |||
| − | |||
| − | |||
| − | |||
| − | |||
| − | |||
| − | |||
| − | |||
| − | |||
| − | |||
| − | |||
| − | |||
| − | |||
| − | |||
| − | |||
| − | |||
| − | |||
| − | |||
| − | |||
| − | |||
| − | |||
| − | |||
| − | |||
| − | |||
| − | |||
| − | |||
| − | |||
| − | |||
| − | |||
| − | |||
| − | |||
| − | |||
| − | |||
| − | |||
| − | |||
| − | |||
| − | |||
| − | |||
| − | |||
| − | |||
| − | |||
| − | |||
| − | |||
| − | |||
| − | |||
| − | |||
| − | |||
| − | |||
| − | |||
| − | |||
| − | |||
| − | |||
| − | |||
| − | |||
| − | |||
| − | |||
| − | |||
| − | |||
| − | |||
| − | |||
| − | |||
| − | |||
| − | |||
| − | |||
| − | |||
| − | |||
| − | |||
| − | |||
| − | |||
| − | |||
| − | |||
| − | |||
</table> | </table> | ||
| Line 303: | Line 92: | ||
2. Follow the maps below. | 2. Follow the maps below. | ||
| − | [[file:abyssal king map.png]] | + | [[file:abyssal king map.png|link=]] |
3. To face Abyssal King, pull the lever.<br> | 3. To face Abyssal King, pull the lever.<br> | ||
You can go either solo or with other 13 players. | You can go either solo or with other 13 players. | ||
| − | [[file:abyssal king lever.gif]] | + | [[file:abyssal king lever.gif|link=]] |
== Mechanics == | == Mechanics == | ||
| Line 318: | Line 107: | ||
Simply make your strategy to murder the boss while you dodge all boss regular mechanics. | Simply make your strategy to murder the boss while you dodge all boss regular mechanics. | ||
| − | [[file:abyssal king fight.gif]] | + | [[file:abyssal king fight.gif|link=]] |
<hr> | <hr> | ||
By curiosity, not killing the Abyss Portals will turn the boss into the Eternal Abyssal King.<br> | By curiosity, not killing the Abyss Portals will turn the boss into the Eternal Abyssal King.<br> | ||
| Line 325: | Line 114: | ||
Otherwise... stay live enough to dodge the mechanics. | Otherwise... stay live enough to dodge the mechanics. | ||
| − | [[file:eternal abyssal king fight.gif]] | + | [[file:eternal abyssal king fight.gif|link=]] |
Latest revision as of 03:43, 16 August 2026
Boss
To go back to bosses page, click here

Boss Info
 Classification: Archfoe
 Location: Lost Mountain Abyssal
 Health: 6kk
 Experience: 12.5kk
Bosstiary Progress
 Prowess: 5 kills
 Expertise: 20 kills
 Mastery: 40 kills
Loot Table
|
|
|
|
|
|
     |


 3-6x crystal coin
 giant amethyst
 1-2x giant ruby
 1-2x giant emerald
 1-2x giant topaz
 giant sapphire
 1-16x ultimate mana potion
 1-16x ultimate spirit potion
 1-16x supreme health potion
 1-5x mastermind potion
 1-5x bullseye potion
 2-5x berserk potion


Location
1. Take the waypoint to Aurora - Lost Mountain Abyssal
2. Follow the maps below.
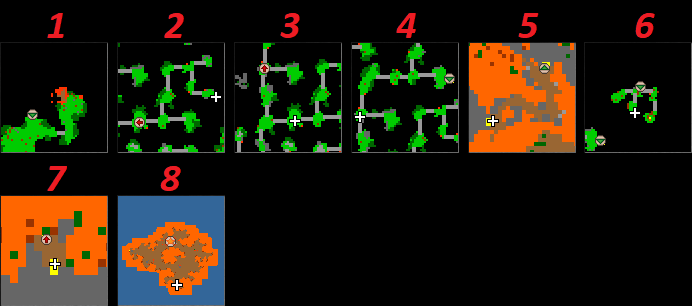
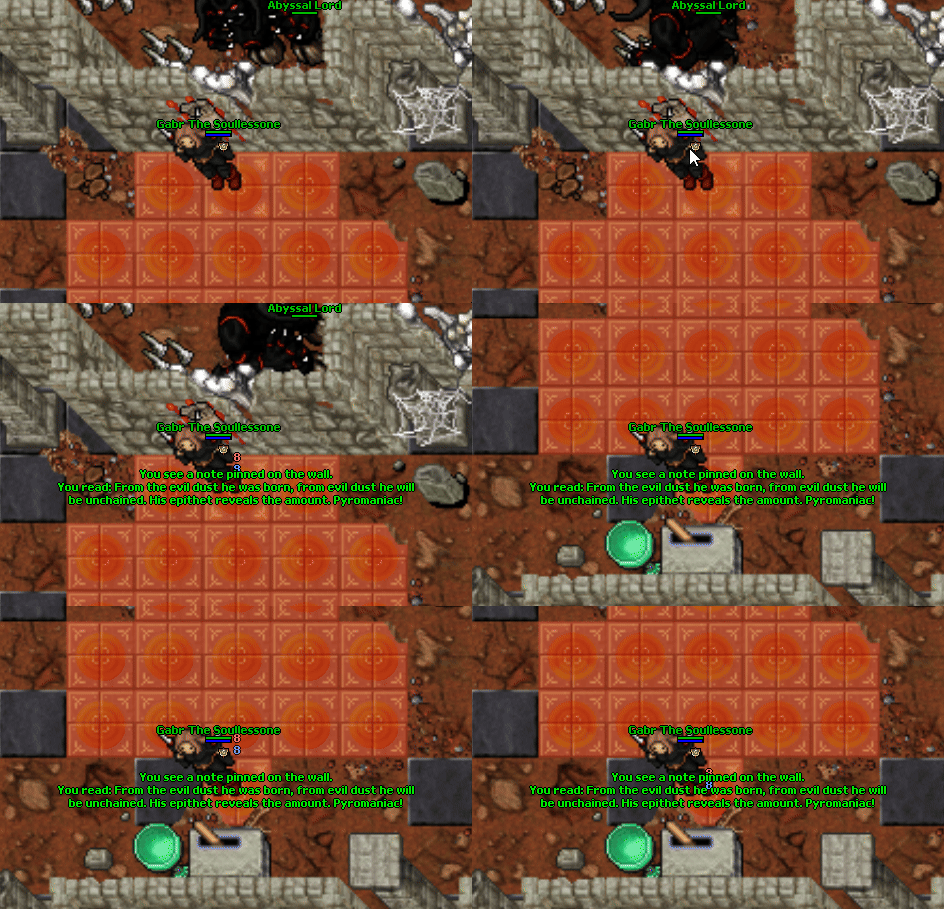
3. To face Abyssal King, pull the lever.
You can go either solo or with other 13 players.
Mechanics
At first, the main focus will not be on the boss, but on the 5 Abyss Portals around the room.
They have a counter that goes up to 60, and your team must destroy (kill) them before it reaches 60 seconds.
If there are no Abyss Portals alive, focus on the boss, and repeat it until the boss is dead.
Simply make your strategy to murder the boss while you dodge all boss regular mechanics.
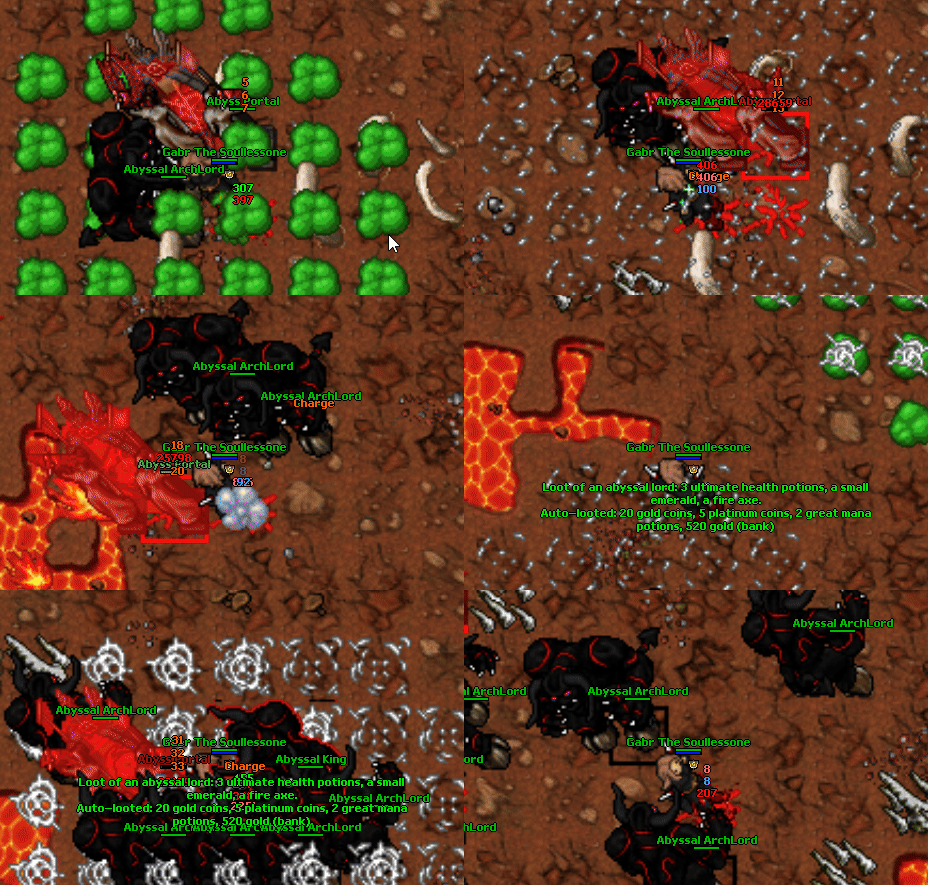
By curiosity, not killing the Abyss Portals will turn the boss into the Eternal Abyssal King.
If he does it, try to run as further as possible from the boss location and teleport back to temple.
Otherwise... stay live enough to dodge the mechanics.