|
|
| Line 44: |
Line 44: |
| | | | |
| | <i>""</i> | | <i>""</i> |
| − |
| |
| − | == Second Mission: Bring Me the Knowledge (Part One) ==
| |
| − | Old Librarian will give you a Treasure Map [[file:Treasure Map.gif]] asking you to bring back Ferumbras' knowledge.
| |
| − |
| |
| − | Everytime you use this map, you will have a tip of where you should look for.<br>
| |
| − | You must find 16 hidden bookshelves, but for now, only 8 bookshelves located in [[Aurora|Aurora]] will be needed.
| |
| − |
| |
| − | <i>"Take this map, find all the hidden book shelves around the lands of Aurora and bring the knowledge back to me,
| |
| − | I will try to find a way to access the library and destroy this evil once and for all."</i>
| |
| − |
| |
| − | === Aurora Bookshelves ===
| |
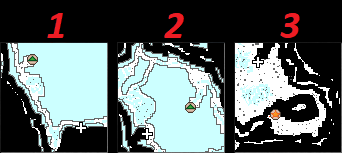
| − | 1. Get the waypoint to <b><i>"Aurora"</i></b> and then <b><i>"Mutated's Plains"</i></b><br>
| |
| − | Follow the map and click on the bookshelf to absorb the knowledge.
| |
| − |
| |
| − | [[file:witches and necromancers.png]]
| |
| − |
| |
| − | [[file:witches and necromancers bookshelf.gif]]
| |
| − |
| |
| − | 2. Get the waypoint to <b><i>"Aurora"</i></b> and then <b><i>"Earth Castle"</i></b><br>
| |
| − | Follow the map and click on the bookshelf to absorb the knowledge.
| |
| − | * on map 4, pull the lever and run to the map 9 before the gate closes.
| |
| − |
| |
| − | [[file:energy lords in a tower.png]]
| |
| − |
| |
| − | [[file:energy lords in a tower bookshelf.gif]]
| |
| − |
| |
| − | 3. Get the waypoint to <b><i>"Aurora"</i></b> and then <b><i>"Askarak Demons"</i></b><br>
| |
| − | Follow the map and click on the bookshelf to absorb the knowledge.
| |
| − |
| |
| − | [[file:demon skeletons and ghosts.png]]
| |
| − |
| |
| − | [[file:demon skeletons and ghosts bookshelf.gif]]
| |
| − |
| |
| − | 4. Get the waypoint to <b><i>"Aurora"</i></b> and then <b><i>"Askarak Demons"</i></b><br>
| |
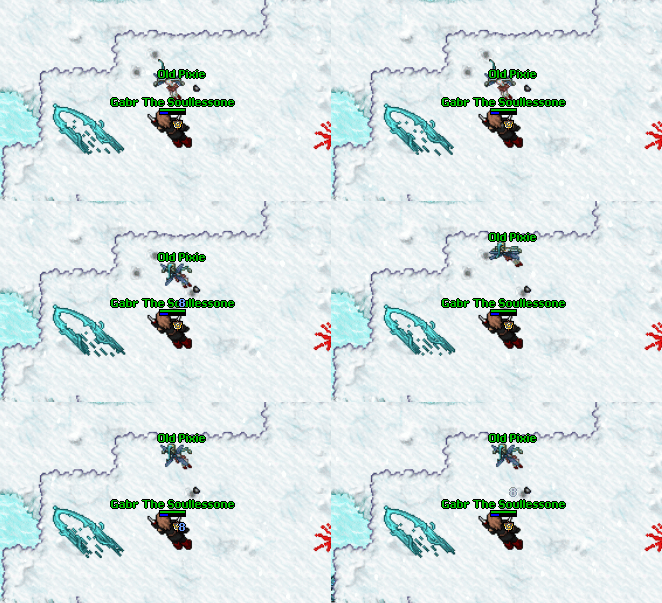
| − | Follow the map and click on the bookshelf to absorb the knowledge.
| |
| − |
| |
| − | [[file:midnight panthers.png]]
| |
| − |
| |
| − | [[file:midnight panthers bookshelf.gif]]
| |
| − |
| |
| − | 5. Get the waypoint to <b><i>"Aurora"</i></b> and then <b><i>"Chambers of the Grim Reaper"</i></b><br>
| |
| − | [[Chambers of the Grim Reaper Waypoint|Check here]] if you don't have access to this waypoint.<br>
| |
| − |
| |
| − | Follow the map and click on the bookshelf to absorb the knowledge.
| |
| − |
| |
| − | [[file:raging mages.png]]
| |
| − |
| |
| − | [[file:raging mages bookshelf.gif]]
| |
| − |
| |
| − | 6. Get the waypoint to <b><i>"Aurora"</i></b> and then <b><i>"Mages Sanctum"</i></b><br>
| |
| − | [[Chambers of the Grim Reaper Waypoint|Check here]] if you don't have access to this waypoint.<br>
| |
| − |
| |
| − | Follow the map and click on the bookshelf to absorb the knowledge.
| |
| − |
| |
| − | [[file:crystal wolves.png]]
| |
| − |
| |
| − | [[file:crystal wolves bookshelf.gif]]
| |
| − |
| |
| − | 7. Get the waypoint to <b><i>"Aurora"</i></b> and then <b><i>"50cc Door"</i></b><br>
| |
| − | [[50cc Door Waypoint|Check here]] if you don't have access to this waypoint.<br>
| |
| − |
| |
| − | Follow the map and click on the bookshelf to absorb the knowledge.
| |
| − |
| |
| − | [[file:ghastly dragons.png]]
| |
| − |
| |
| − | [[file:ghastly dragons bookshelf.gif]]
| |
| − |
| |
| − | 8. Get the waypoint to <b><i>"Aurora"</i></b> and then <b><i>"50cc door"</i></b><br>
| |
| − | [[50cc Door Waypoint|Check here]] if you don't have access to this waypoint.<br>
| |
| − |
| |
| − | Follow the map and click on the bookshelf to absorb the knowledge.
| |
| − |
| |
| − | [[file:energized raging mages.png]]
| |
| − |
| |
| − | [[file:energized raging mages bookshelf.gif]]
| |
| − |
| |
| − | Once you absorb all 8 bookshelves knowledge, return to Old Librarian to delivery your <b><i>mission</i></b>
| |
| − | <i>"Incredible, with this knowlege I can start working on a plan to access the unsecret libary, but this alone wont be enough..."</i>
| |
| − |
| |
| − | == Third Mission: Pillars of Serpents ==
| |
| − | Old Librarian will ask you for another proof of your strength. You will have to kill 5000 members of the order of the cobra.
| |
| − |
| |
| − | <i>"According to these pages the living books are far stronger than I expected, so I will have to ask you for another proof of strength.
| |
| − | Kill 5000 members of the order of the cobra and come back to me."</i>
| |
| − |
| |
| − | Once you find your way through this massacre you must do, return to Old Librarian to deliver the <b>mission</b>.<br>
| |
| − | <i>"<b>(Gabr - Unfortunately, I missed this dialog message.)"</b></i>
| |
| − |
| |
| − | == Fourth Mission: Bring Me the Knowledge (Part Two) ==
| |
| − | Old Librarian will give you another Treasure Map [[file:Treasure Map.gif]] asking you to bring the rest of Ferumbras' knowledge.
| |
| − |
| |
| − | You will have to find the remaining 8 bookshelves, but now, all of them located in [[Dry Creek|Dry Creek]].
| |
| − |
| |
| − | <i>"<b>(Gabr - Unfortunately, I missed this dialog message.)"</b></i>
| |
| − |
| |
| − | === Dry Creek Bookshelves ===
| |
| − | 1. Get the waypoint to <b><i>"Aurora"</i></b> and then <b><i>"Rotworm Cave"</i></b><br>
| |
| − | Follow the map and click on the bookshelf to absorb the knowledge.
| |
| − |
| |
| − | [[file:the_wisdom_of_solitude_map.png]]
| |
| − |
| |
| − | [[file:dwarves bookshelf.gif]]
| |
| − |
| |
| − | 2. Get the waypoint to <b><i>"Mainland"</i></b> and then <b><i>"Temple - Dry Creek"</i></b><br>
| |
| − | Follow the map and click on the bookshelf to absorb the knowledge.
| |
| − |
| |
| − | [[file:dragon lords bookshelf.png]]
| |
| − |
| |
| − | [[file:dragon lords bookshelf.gif]]
| |
| − |
| |
| − | 3. Get the waypoint to <b><i>"Mainland"</i></b> and then <b><i>"Lion's Bastion"</i></b><br>
| |
| − | [[Lions Bastion Waypoint|Check here]] if you don't have access to the waypoint.<br>
| |
| − | Follow the map and click on the bookshelf to absorb the knowledge.
| |
| − |
| |
| − | [[file:lions bastion bookshelf.png]]
| |
| − |
| |
| − | [[file:lions bastion bookshelf.gif]]
| |
| − |
| |
| − | 4. Get the waypoint to <b><i>"Mainland"</i></b> and then <b><i>"Temple - Greenvile"</i></b><br>
| |
| − | [[Greenvile Temple Waypoint|Check here]] if you don't have access to the waypoint.<br>
| |
| − | Follow the map and click on the bookshelf to absorb the knowledge.
| |
| − |
| |
| − | [[file:pigs bookshelf.png]]
| |
| − |
| |
| − | [[file:pigs bookshelf.gif]]
| |
| − |
| |
| − | 5. Get the waypoint to <b><i>"Mainland"</i></b> and then <b><i>"Banshee's Isle"</i></b><br>
| |
| − | [[Banshees Isle Waypoint|Check here]] if you don't have access to the waypoint.<br>
| |
| − | Follow the map and click on the bookshelf to absorb the knowledge.
| |
| − |
| |
| − | [[file:warlocks bookshelf.png]]
| |
| − |
| |
| − | [[file:warlocks bookshelf.gif]]
| |
| − |
| |
| − | 6. Get the waypoint to <b><i>"Mainland"</i></b> and then <b><i>"The Demon's Pit"</i></b><br>
| |
| − | [[The Demons Pit Waypoint|Check here]] if you don't have access to the waypoint.<br>
| |
| − | Follow the map and click on the bookshelf to absorb the knowledge.
| |
| − |
| |
| − | [[file:demons bookshelf.png]]
| |
| − |
| |
| − | [[file:demons bookshelf.gif]]
| |
| − |
| |
| − | 7. Get the waypoint to <b><i>"Mainland"</i></b> and then <b><i>"Ancient Ruins Tomb"</i></b><br>
| |
| − | Follow the map and click on the bookshelf to absorb the knowledge.
| |
| − |
| |
| − | [[file:behemoths bookshelf.png]]
| |
| − |
| |
| − | [[file:behemoths bookshelf.gif]]
| |
| − |
| |
| − | 8. Get the waypoint to <b><i>"Mainland"</i></b> and then <b><i>"Heroes Cavern"</i></b><br>
| |
| − | Follow the map and click on the bookshelf to absorb the knowledge.
| |
| − |
| |
| − | [[file:heroes bookshelf.png]]
| |
| − |
| |
| − | [[file:heroes bookshelf.gif]]
| |
| − |
| |
| − | Once you absorb the remaining 8 bookshelves knowledge, return to Old Librarian to delivery your <b><i>mission</i></b><br>
| |
| − | <i>"These pages you just brough me are quite disturbing to say the least..."</i>
| |
| − |
| |
| − | == Fifth Mission: The Tourmalines ==
| |
| − | Old Librarian will ask you for another proof of your strength. You will have to kill 5000 Tourmalines.<br>
| |
| − | [[Tourmaline Access Quest|Check here]] if you don't have access to the Tourmalines yet.
| |
| − |
| |
| − | <i>"Seems like the ancient magic from the library is escaping to the world...
| |
| − | The tourmalines were created by this ancient magic, you can find them east of Roshalore behind the 4kk door.
| |
| − | Kill 5000 tourmalines and come back to me."</i>
| |
| − |
| |
| − | Once you find your way through this massacre you must do, return to Old Librarian to deliver the <b>mission</b>.<br>
| |
| − | <i>"Fantastic work! seems like the ancient magic has been controled for now."</i>
| |
| − |
| |
| − | == Sixth Mission: The Lord of the Triangle ==
| |
| − | To progress, Old Librarian will ask you to definitely close the gates of hell by defeating Morgaroth.
| |
| − |
| |
| − | <i>"While you were completing the mission I managed to dig deeper into these pages. I found that
| |
| − | the demon king Morgaroth is using his power to open the gates of the ancient library, his goal is
| |
| − | to bring chaos and demise to the world. You seem to be the only person who can handle such a massive feat."</i>
| |
| − |
| |
| − | To kill Morgaroth, you can follow [[Morgaroth_Walkthrough|this walkthrough]].
| |
| − |
| |
| − | Once you find your way through this massacre you must do, return to Old Librarian to deliver the mission.
| |
| − | <i>"Outstanding."</i>
| |
| − |
| |
| − | == Final Mission: Trial of Life and Death ==
| |
| − | For the final mission, Old Librarian will ask you to find and face The True Orchid.
| |
| − |
| |
| − | <i>"Now the finish mission, head deep into the true asuras hideouts and find and ancient lever which leads
| |
| − | to the trials of life and death. This mission is hard and probably only death awaits if you decide to face it,
| |
| − | if you survive, come back to me and I will grant you access to the unsecret libary."</i>
| |
| − |
| |
| − | 1. Get the waypoint to <b><i>"Roshalor"</i></b> and then <b><i>"Clomps Plains"</i></b>.<br>
| |
| − | Follow the maps below to find Azariel NPC.
| |
| − |
| |
| − | [[file:azariel map 1.png]]
| |
| − |
| |
| − | 2. Ask Azariel to <b><i>pass</i></b>, you will have to gather stuff to cross the sealed door.<br>
| |
| − | All you need is: 15 sight of surrender's eyes and 35 cluster of solace.
| |
| − |
| |
| − | <i>"To pass through the sacred gate, I require some items..."</i>
| |
| − |
| |
| − | 3. Once you find your way to gather all requirements, return to to deliver it and <b>pass</b>.
| |
| − |
| |
| − | <i>"Your contribution has been accepted. You may now pass through the door."</i>
| |
| − |
| |
| − | 4. To kill The Flaming Orchid, you can follow [[The Flaming Orchid Walkthrough|this walkthrough]].
| |
| − |
| |
| − | Once you find your way through this massacre you must do, return to Old Librarian to deliver the final mission.
| |
| − | <i>"This is it! Everything is set then, click on the book shelf right beside you and beware with the dangers that lay ahead."</i>
| |
| − |
| |
| − | <hr>
| |
| − | That's all, folks. If you want to see how to unlock the Ancient Library, [[Ancient Library Waypoint|click here]]
| |
![]()
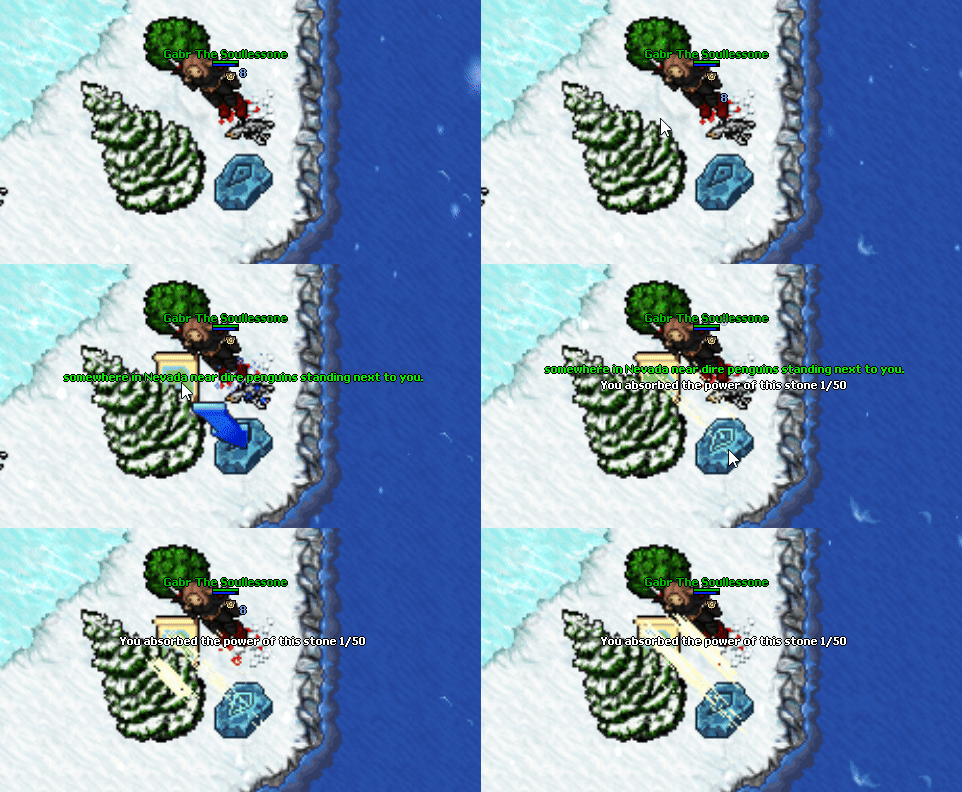
![]() that you must click to absorb the power.
that you must click to absorb the power.


