Difference between revisions of "Stone Gorgon"
| (3 intermediate revisions by the same user not shown) | |||
| Line 1: | Line 1: | ||
== Boss == | == Boss == | ||
| − | <i>To go back to bosses page, [[Bosses|click here]]</i> | + | <i>To go back to bosses page, [[Bosses List|click here]]</i> |
<hr> | <hr> | ||
| − | [[File:Stone Gorgon.gif]] | + | [[File:Stone Gorgon.gif|link=]] |
<b>Boss Info</b><br> | <b>Boss Info</b><br> | ||
| − | [[file:Bosstiary Archfoe.png]] Classification: Archfoe<br> | + | [[file:Bosstiary Archfoe.png|link=]] Classification: Archfoe<br> |
| − | [[file:Speed Icon.gif]] Location: Rascacoon Bay<br> | + | [[file:Speed Icon.gif|link=]] Location: Rascacoon Bay<br> |
| − | [[File:HP Icon.gif]] Health: 7kk<br> | + | [[File:HP Icon.gif|link=]] Health: 7kk<br> |
| − | [[File:XP Icon.gif]] Experience: 12.5k | + | [[File:XP Icon.gif|link=]] Experience: 12.5k |
<b>Bosstiary Progress</b><br> | <b>Bosstiary Progress</b><br> | ||
| − | [[file:Prowess Icon.gif]] Prowess: 5 kills<br> | + | [[file:Prowess Icon.gif|link=]] Prowess: 5 kills<br> |
| − | [[file:Expertise Icon.gif]] Expertise: 20 kills<br> | + | [[file:Expertise Icon.gif|link=]] Expertise: 20 kills<br> |
| − | [[file:Mastery Icon.gif]] Mastery: 40 kills | + | [[file:Mastery Icon.gif|link=]] Mastery: 40 kills |
== Loot Table == | == Loot Table == | ||
| + | |||
<table class="wikitable sortable"> | <table class="wikitable sortable"> | ||
| − | |||
| − | |||
| − | |||
| − | |||
| − | |||
| − | |||
<tr> | <tr> | ||
| − | <td align=" | + | <td align="left" valign="top"> |
| − | + | <center>'''[[Items|Boss Items]]'''</center> | |
| − | + | [[File:Boss Coin2.gif|link=]] [[Boss Coin Shop|1-4x boss coin]]<br> | |
| − | + | [[File:Relic Chest.gif|link=]] [[Relics#Relic_List|relic chest]] | |
| − | + | [[File:Attunement Item 3.gif|alt=]] [[Soul Attunement|soul of stone gorgon]] | |
| − | |||
| − | |||
| − | |||
| − | |||
| − | + | [[File:Emerald Herald Powercrystal.gif|link=]] [[Gear Evolution|emerald herald powercrystal]] | |
| − | |||
| − | |||
| − | |||
| − | |||
| − | + | [[File:Emerald Herald Helmet.gif|link=]] [[Helmets|emerald herald helmet]]<br>[[File:Emerald Herald Plate.gif|link=]] [[Armors|emerald herald plate]] | |
| − | |||
| − | |||
| − | |||
| − | |||
| − | + | [[File:Merudri Battle Mail.gif|alt=]] [[Armors|merudri battle mail]] | |
| − | |||
| − | |||
| − | |||
| − | |||
| − | + | [[File:Emerald Herald Legs.gif|link=]] [[Legs|emerald herald legs]] | |
| − | |||
| − | |||
| − | |||
| − | |||
| − | + | [[File:Emerald Herald Boots.gif|link=]] [[Boots|emerald herald boots]] | |
| − | |||
| − | |||
| − | |||
| − | |||
| − | + | [[File:Emerald Herald Shield.gif|link=]] [[Shields|emerald herald shield]] | |
| − | |||
| − | |||
| − | |||
| − | |||
| − | + | [[File:Emerald Herald Necklace.gif|link=]] [[Amulets|emerald herald necklace]] | |
| − | |||
| − | |||
| − | |||
| − | |||
| − | + | [[File:Emerald Herald Ring.gif|link=]] [[Rings|emerald herald ring]] | |
| − | |||
| − | |||
| − | |||
| − | |||
| − | + | [[File:Emerald Herald Backpack.gif|link=]] [[Backpacks|emerald herald backpack]] | |
| − | |||
| − | |||
| − | |||
| − | |||
| − | + | [[File:Emerald Herald Staff.gif|link=]] [[Wands|emerald herald staff]] | |
| − | |||
| − | |||
| − | |||
| − | |||
| − | + | [[File:Emerald Herald Bow.gif|link=]] [[Bows|emerald herald bow]]<br>[[File:Emerald Herald Sword.gif|link=]] [[Swords|emerald herald sword]] | |
| − | |||
| − | |||
| − | |||
| − | |||
| − | + | [[File:Emerald Herald Axe.gif|link=]] [[Axes|emerald herald axe]] | |
| − | |||
| − | |||
| − | |||
| − | |||
| − | + | [[File:Emerald Herald Mace.gif|link=]] [[Clubs|emerald herald mace]] | |
| − | |||
| − | |||
| − | |||
| − | |||
| − | + | [[File:Emerald Herald Dagger.gif|link=]] [[Daggers|emerald herald dagger]] | |
| − | |||
| − | |||
| − | |||
| − | |||
| − | + | [[File:Cobra Bo.gif|alt=]] [[Fists|emerald herald bo]] | |
| − | + | </td> | |
| − | <td align=" | + | <td align="left" valign="top"> |
| − | < | + | <center>'''[[Jewelry]]'''</center> |
| − | + | [[File:Crystal Coin.gif|link=]] 3-6x crystal coin | |
| − | + | [[File:Giant Amethyst.gif|link=]]giant amethyst<br> | |
| − | + | [[File:Giant Ruby.gif|link=]] 1-2x giant ruby | |
| − | |||
| − | |||
| − | |||
| − | + | [[File:Giant Emerald.gif|link=]]1-2x giant emerald | |
| − | |||
| − | |||
| − | |||
| − | |||
| − | + | [[File:Giant Topaz.gif|link=]]1-2x giant topaz | |
| − | |||
| − | |||
| − | |||
| − | |||
| − | < | + | [[File:Giant Sapphire.gif|link=]]giant sapphire |
| − | <td align="center | + | </td> |
| − | < | + | <td align="left" valign="top"> |
| − | + | <center>'''[[Liquids]]'''</center> | |
| + | [[File:Ultimate Mana Potion.gif|link=]] 1-16x ultimate mana potion<br> | ||
| + | [[File:Ultimate Spirit Potion.gif|link=]] 1-16x ultimate spirit potion<br> | ||
| + | [[File:Supreme Health Potion.gif|link=]] 1-16x supreme health potion<br> | ||
| + | [[File:Mastermind Potion.gif|link=]] 1-5x mastermind potion<br> | ||
| + | [[File:Bullseye Potion.gif|link=]] 1-5x bullseye potion<br> | ||
| + | [[File:Berserk Potion.gif|link=]] 2-5x berserk potion | ||
| + | </td> | ||
</tr> | </tr> | ||
| − | |||
<tr> | <tr> | ||
| − | <td align="center | + | <td align="left" valign="top"> |
| − | + | <center>[[Gem Atelier|'''Gems''']] | |
| − | + | [[File:Lesser Marksman Gem.gif|link=]][[File:Lesser Mystic Gem.gif|link=]][[File:Lesser Sage Gem.gif|link=]][[File:Lesser Guardian Gem.gif|link=]][[File:Lesser Spiritualist Gem.gif|link=]][[File:Lesser Ninja Gem.gif|link=]] | |
| − | |||
| − | + | [[File:Marksman Gem.gif|link=]][[File:Mystic Gem.gif|link=]][[File:Sage Gem.gif|link=]][[File:Guardian Gem.gif|link=]][[File:Spiritualist Gem.gif|alt=]][[File:Ninja Gem.gif|link=]] | |
| − | |||
| − | |||
| − | |||
| − | |||
| − | + | [[File:Greater Marksman Gem.gif|link=]][[File:Greater Mystic Gem.gif|link=]][[File:Greater Sage Gem.gif|link=]][[File:Greater Guardian Gem.gif|link=]][[File:Greater Spiritualist Gem.gif|alt=]][[File:Greater Ninja Gem.gif|link=]] | |
| − | + | </center> | |
| − | + | </td> | |
| − | <td align=" | + | <td align="left" valign="top"> |
| − | + | <center>[[Pet Upgrading#Boosts|'''Pet Boost Tokens''']] | |
| + | [[File:petice.gif|link=]][[File:petdeath.gif|link=]][[File:petholy.gif|link=]][[File:petfire.gif|link=]][[File:petenergy.gif|link=]][[File:petearth.gif|link=]] | ||
| − | + | [[File:petphysical.gif|link=]][[File:petdistance.gif|link=]][[File:petmagic.gif|link=]][[File:petdmg.gif|link=]][[File:petmelee.gif|link=]]</center> | |
| − | + | </td> | |
| − | + | <td align="left" valign="top"></td> | |
| − | |||
| − | |||
| − | |||
| − | |||
| − | |||
| − | |||
| − | |||
| − | |||
| − | |||
| − | |||
| − | |||
| − | |||
| − | <td align=" | ||
</tr> | </tr> | ||
| − | |||
| − | |||
| − | |||
| − | |||
| − | |||
| − | |||
| − | |||
| − | |||
| − | |||
| − | |||
| − | |||
| − | |||
| − | |||
| − | |||
| − | |||
| − | |||
| − | |||
| − | |||
| − | |||
| − | |||
| − | |||
| − | |||
| − | |||
| − | |||
| − | |||
| − | |||
| − | |||
| − | |||
| − | |||
| − | |||
| − | |||
| − | |||
| − | |||
| − | |||
| − | |||
| − | |||
| − | |||
| − | |||
| − | |||
| − | |||
| − | |||
| − | |||
| − | |||
| − | |||
| − | |||
| − | |||
| − | |||
| − | |||
| − | |||
| − | |||
| − | |||
| − | |||
| − | |||
| − | |||
| − | |||
| − | |||
| − | |||
| − | |||
| − | |||
| − | |||
| − | |||
| − | |||
| − | |||
| − | |||
| − | |||
| − | |||
| − | |||
| − | |||
| − | |||
| − | |||
| − | |||
| − | |||
| − | |||
| − | |||
| − | |||
| − | |||
| − | |||
| − | |||
| − | |||
| − | |||
| − | |||
| − | |||
| − | |||
| − | |||
| − | |||
| − | |||
| − | |||
| − | |||
| − | |||
| − | |||
| − | |||
| − | |||
| − | |||
| − | |||
| − | |||
| − | |||
| − | |||
| − | |||
| − | |||
| − | |||
| − | |||
| − | |||
| − | |||
| − | |||
| − | |||
| − | |||
| − | |||
| − | |||
| − | |||
| − | |||
| − | |||
| − | |||
| − | |||
| − | |||
| − | |||
| − | |||
| − | |||
| − | |||
| − | |||
| − | |||
| − | |||
| − | |||
| − | |||
| − | |||
| − | |||
| − | |||
| − | |||
| − | |||
| − | |||
| − | |||
| − | |||
| − | |||
| − | |||
| − | |||
| − | |||
| − | |||
| − | |||
| − | |||
| − | |||
| − | |||
| − | |||
| − | |||
| − | |||
| − | |||
| − | |||
| − | |||
| − | |||
| − | |||
| − | |||
| − | |||
| − | |||
| − | |||
| − | |||
| − | |||
</table> | </table> | ||
| Line 347: | Line 106: | ||
* On map 9, go through the sealed door. | * On map 9, go through the sealed door. | ||
| − | [[file:stone gorgon map 1.png]] | + | [[file:stone gorgon map 1.png|link=]] |
=== First Puzzle: Meeting Green Crystals === | === First Puzzle: Meeting Green Crystals === | ||
On the first puzzle, you will have to remove a statue on your way.<br> | On the first puzzle, you will have to remove a statue on your way.<br> | ||
| − | For that, you will have to put 4 green gems [[File:Green Gem.gif]] on 4 switches [[File:Switch 1.gif]] around the room. | + | For that, you will have to put 4 green gems [[File:Green Gem.gif|link=]] on 4 switches [[File:Switch 1.gif|link=]] around the room. |
| − | [[file:stone gorgon gem location.png]] These are the gems location (might not be accurate if someone was here before). | + | [[file:stone gorgon gem location.png|link=]] These are the gems location (might not be accurate if someone was here before). |
| − | [[file:stone gorgon gem location.gif]] | + | [[file:stone gorgon gem location.gif|link=]] |
| − | [[file:stone gorgon switches location.png]] These are the statues location. | + | [[file:stone gorgon switches location.png|link=]] These are the statues location. |
Now, make your way to put all 4 gems on the switches. | Now, make your way to put all 4 gems on the switches. | ||
| − | [[file:stone gorgon gem positioning.gif]] | + | [[file:stone gorgon gem positioning.gif|link=]] |
| − | Once you place all gems a message will show up, and the statue will be removed, then head to the star marker. [[file:Marker (Star).gif]] | + | Once you place all gems a message will show up, and the statue will be removed, then head to the star marker. [[file:Marker (Star).gif|link=]] |
<i>"A loud sound comes from the south. Something happened."</i> | <i>"A loud sound comes from the south. Something happened."</i> | ||
| − | [[file:stone gorgon statue removed.png]] | + | [[file:stone gorgon statue removed.png|link=]] |
| − | [[file:stone gorgon statue removed.gif]] | + | [[file:stone gorgon statue removed.gif|link=]] |
=== Second Puzzle: The Broken Bridge === | === Second Puzzle: The Broken Bridge === | ||
| − | [[file:stone gorgon map 2.png]] Still with the gems and switches mechanics, go down the stairs and follow the map to get to the second part. | + | [[file:stone gorgon map 2.png|link=]] Still with the gems and switches mechanics, go down the stairs and follow the map to get to the second part. |
| − | [[file:stone gorgon gem location 2.png]] In here, there will be two statues on the exclamation marker. | + | [[file:stone gorgon gem location 2.png|link=]] In here, there will be two statues on the exclamation marker. |
| − | [[file:stone gorgon switches location 2.png]] Do the same, and put it on the both switches on these markers. | + | [[file:stone gorgon switches location 2.png|link=]] Do the same, and put it on the both switches on these markers. |
| − | [[file:stone gorgon bridge repair.gif]] | + | [[file:stone gorgon bridge repair.gif|link=]] |
| − | [[file:stone gorgon bridge.png]] Now you'll be able to pass through the bridge that was broken before. | + | [[file:stone gorgon bridge.png|link=]] Now you'll be able to pass through the bridge that was broken before. |
| − | [[file:stone gorgon lever.png]] Proceed until you find the boss room. | + | [[file:stone gorgon lever.png|link=]] Proceed until you find the boss room. |
3. To face Stone Gorgon, pull the lever.<br> | 3. To face Stone Gorgon, pull the lever.<br> | ||
You can go either solo or with other 15 players. | You can go either solo or with other 15 players. | ||
| − | [[file:stone gorgon lever.gif]] | + | [[file:stone gorgon lever.gif|link=]] |
4. Once you kill it, a teleporter to [[Kraken]] will spawn at the center of the room. | 4. Once you kill it, a teleporter to [[Kraken]] will spawn at the center of the room. | ||
Latest revision as of 00:53, 12 August 2026
Boss
To go back to bosses page, click here

Boss Info
 Classification: Archfoe
 Location: Rascacoon Bay
 Health: 7kk
 Experience: 12.5k
Bosstiary Progress
 Prowess: 5 kills
 Expertise: 20 kills
 Mastery: 40 kills
Loot Table
|
|
|
|
|
|
     |


 3-6x crystal coin
 giant amethyst
 1-2x giant ruby
 1-2x giant emerald
 1-2x giant topaz
 giant sapphire
 1-16x ultimate mana potion
 1-16x ultimate spirit potion
 1-16x supreme health potion
 1-5x mastermind potion
 1-5x bullseye potion
 2-5x berserk potion


Location
1. Take the waypoint to Lakeshire - Rascacoon Bay
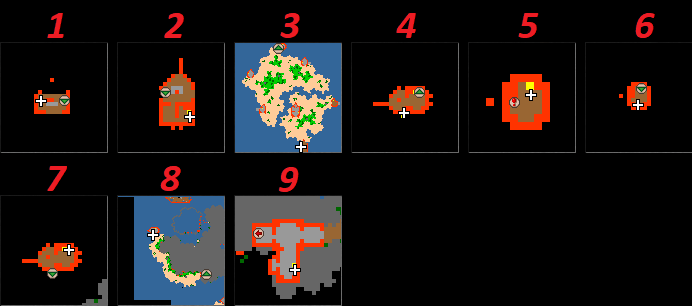
2. Follow the maps.
- On map 5, use the steering wheel of the boat to proceed.
- On map 9, go through the sealed door.
First Puzzle: Meeting Green Crystals
On the first puzzle, you will have to remove a statue on your way.
For that, you will have to put 4 green gems  on 4 switches
  around the room.
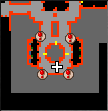 These are the gems location (might not be accurate if someone was here before).
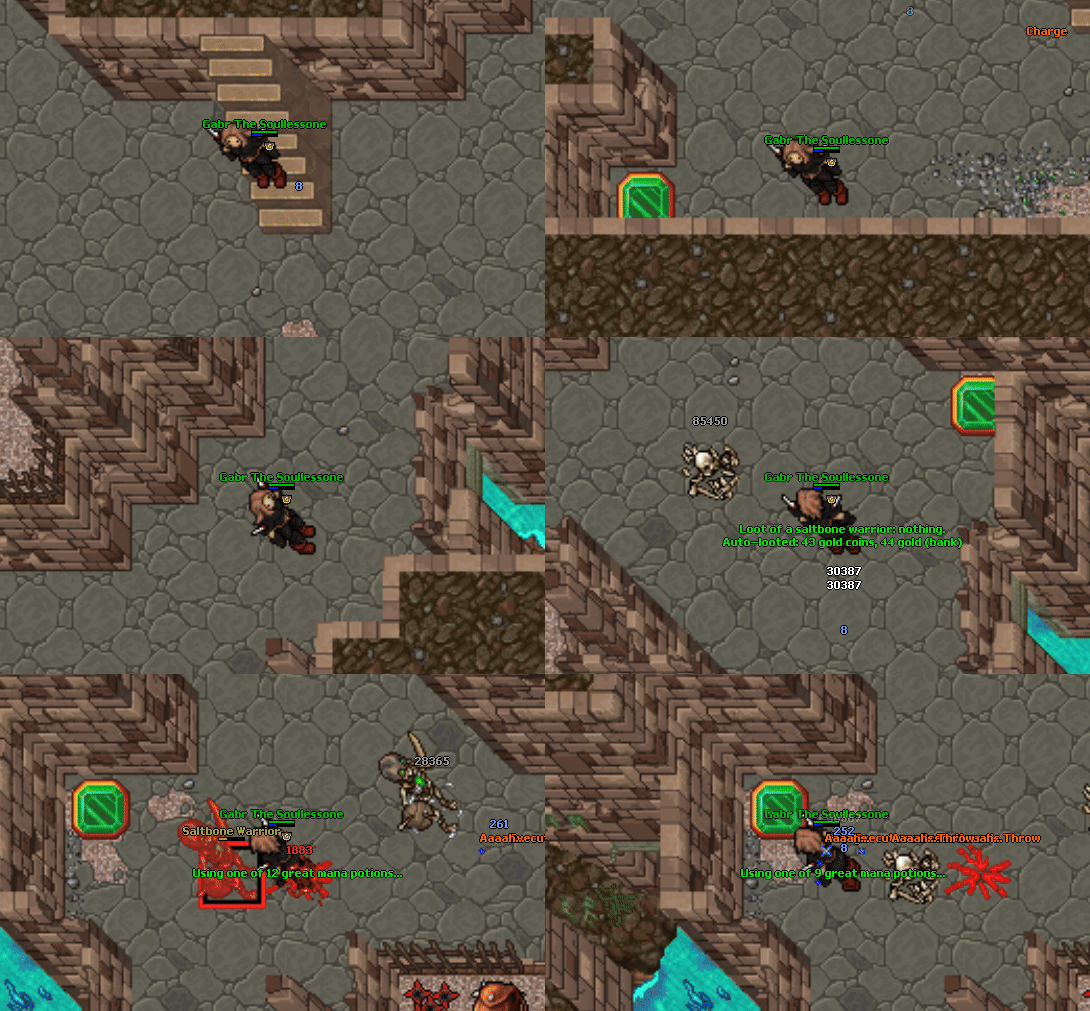
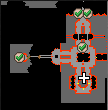 These are the statues location.
Now, make your way to put all 4 gems on the switches.
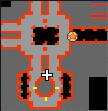
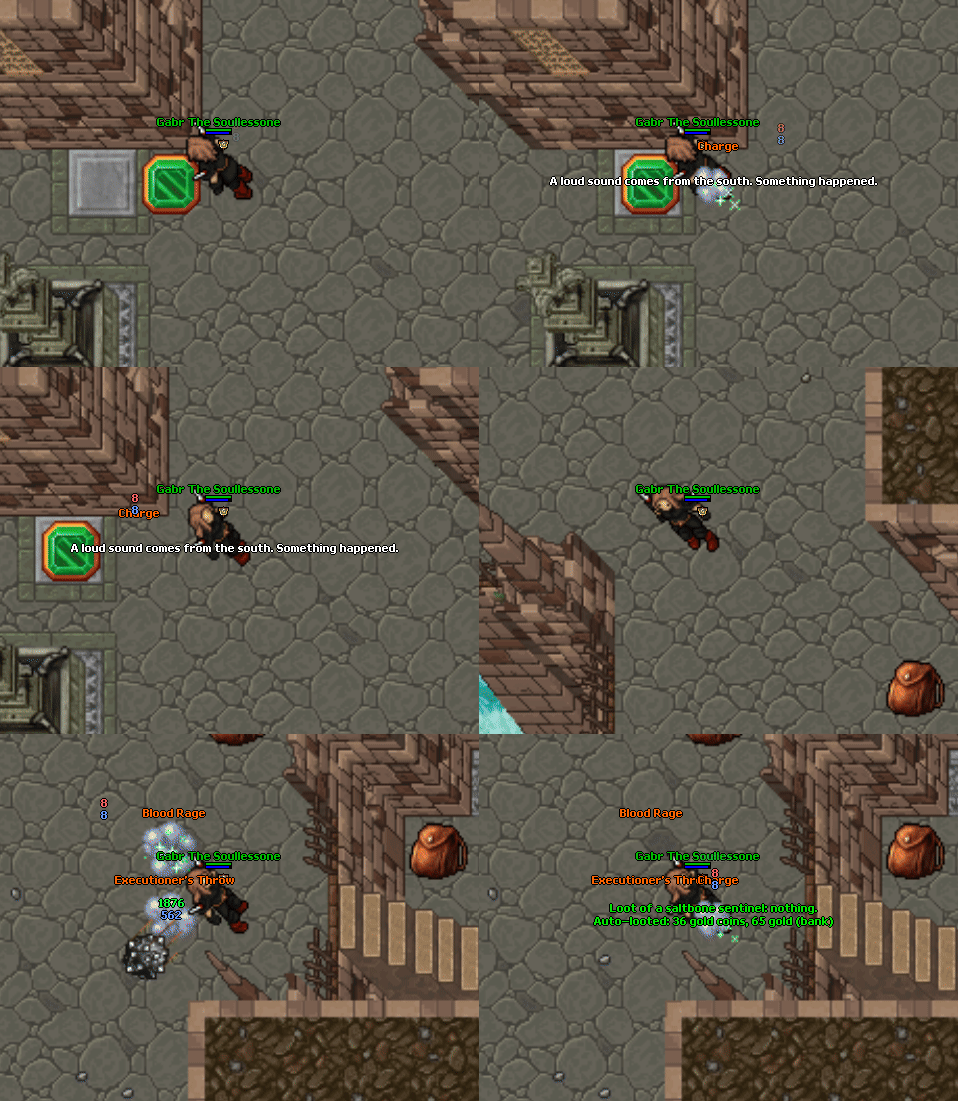
Once you place all gems a message will show up, and the statue will be removed, then head to the star marker. 
"A loud sound comes from the south. Something happened."
Second Puzzle: The Broken Bridge
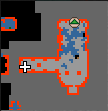 Still with the gems and switches mechanics, go down the stairs and follow the map to get to the second part.
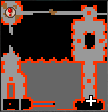 In here, there will be two statues on the exclamation marker.
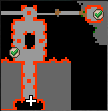 Do the same, and put it on the both switches on these markers.
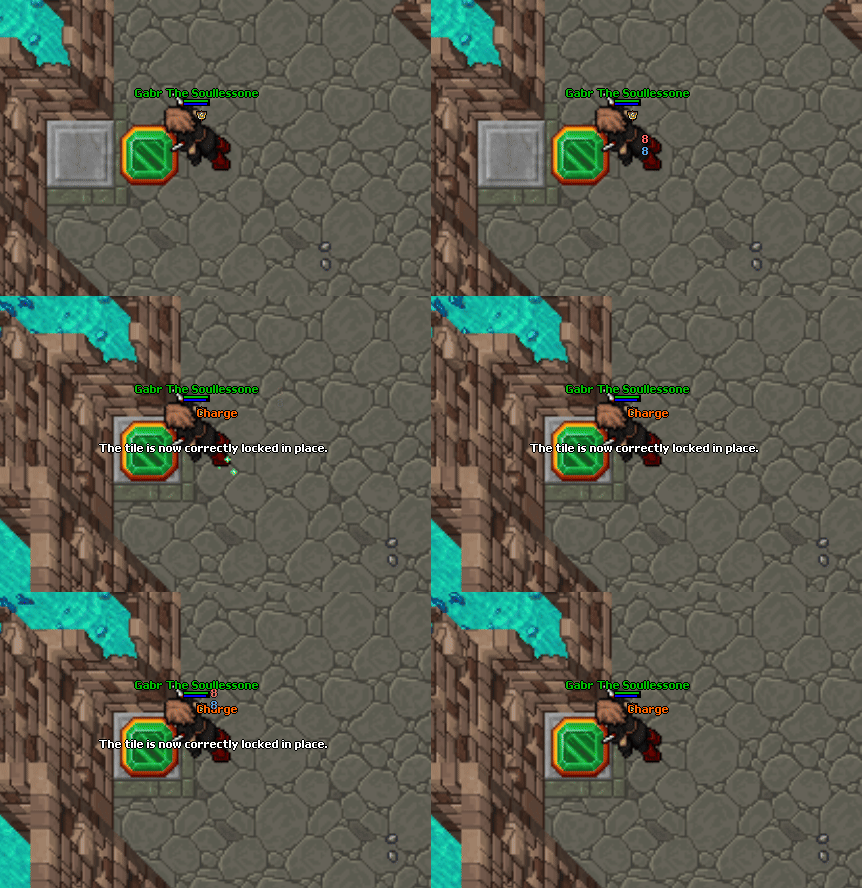
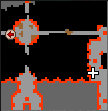 Now you'll be able to pass through the bridge that was broken before.
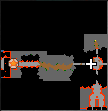 Proceed until you find the boss room.
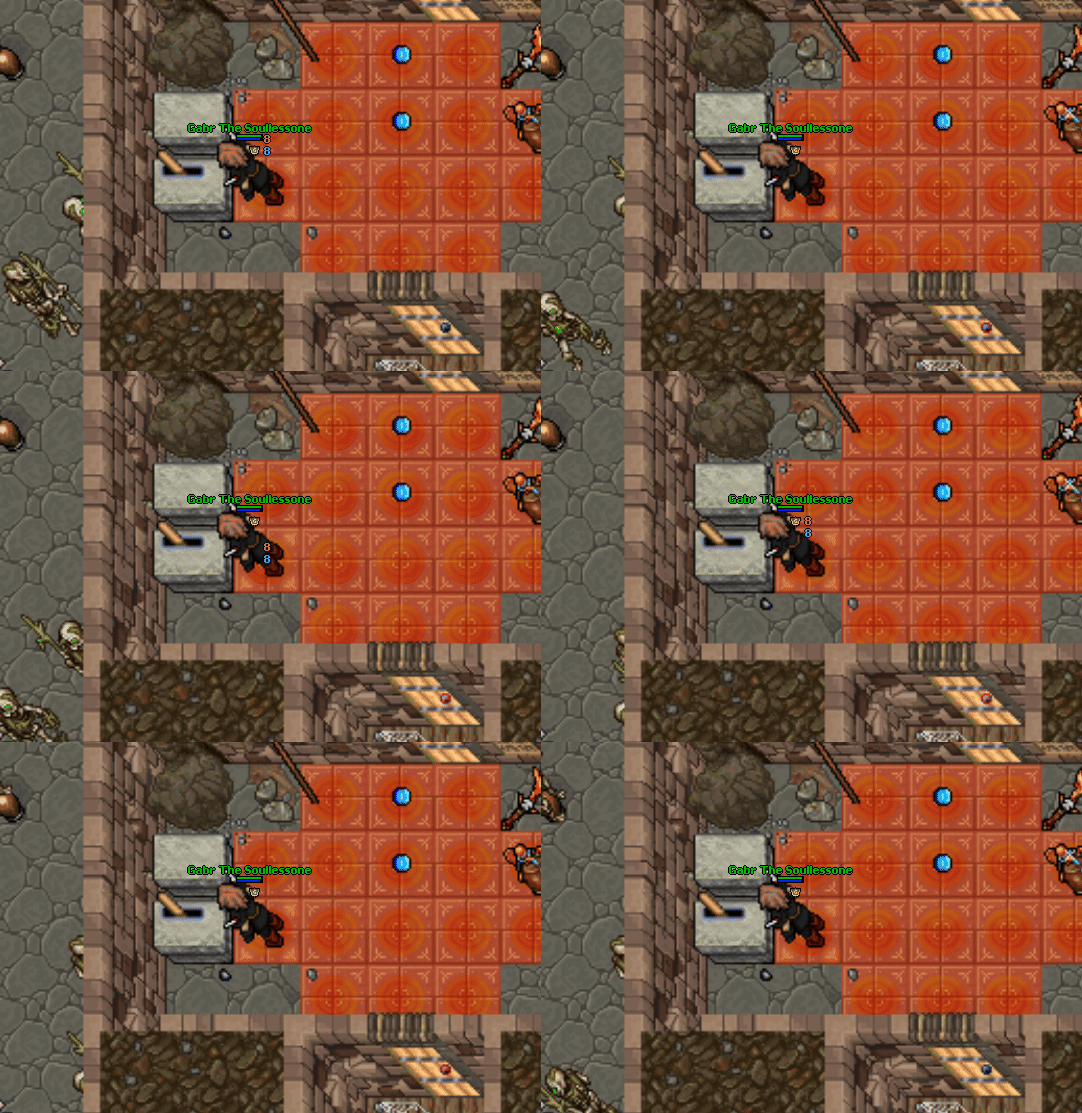
3. To face Stone Gorgon, pull the lever.
You can go either solo or with other 15 players.
4. Once you kill it, a teleporter to Kraken will spawn at the center of the room.
Mechanics
This boss has no special mechanics.