|
|
| (5 intermediate revisions by the same user not shown) |
| Line 1: |
Line 1: |
| − | == Wheel of Destiny ==
| |
| | <b>Idioma/Language:</b> | | <b>Idioma/Language:</b> |
| | [[File:US_Flag.gif|30px|link=Wheel_of_Destiny|alt=English]] | | [[File:US_Flag.gif|30px|link=Wheel_of_Destiny|alt=English]] |
| Line 12: |
Line 11: |
| | | | |
| | [[file:wheel of destiny button.gif]] | | [[file:wheel of destiny button.gif]] |
| | + | <hr> |
| | + | To achieve peak efficiency, character progression relies on a continuous loop between three major systems: |
| | | | |
| − | == Wheel of Destiny Functions ==
| + | [[file:Wheel of Destiny Icon.gif]] [[Wheel of Destiny Functioning|Wheel of Destiny]]<br> |
| − | [[file:Wheel of Destiny Icon.gif]] [[Wheel of Destiny Functioning|Wheel of Destiny]] | + | Earns promotion Points through leveling to clear paths toward major Vessel perks and unlock physical Gem Sockets. |
| − | | |
| − | [[file:Gem Atelier Icon.gif]] [[Gem Atelier]]
| |
| − | | |
| − | [[file:Fragment Workshop Icon.gif]] [[Fragment Workshop]]
| |
| − | | |
| − | == Wheel Functioning ==
| |
| − | The system is divided into nodes, connected in a circular structure.
| |
| − | | |
| − | Each node can grant different types of bonuses such as:<br>
| |
| − | * Damage increase, defensive stats, utility effects and access to new perks or spells
| |
| − | | |
| − | To progress further into the wheel, you must unlock previous nodes.
| |
| − | | |
| − | It is safe to say that you gain 1 point per level starting at level 51, and you can spent them on nodes.<br>
| |
| − | You can reset your wheel at any time inside a protection zone without any permanent penalty.
| |
| − | | |
| − | == Perks ==
| |
| − | While advancing through the wheel, you can unlock two kind of perks: dedication and relevation.
| |
| − | | |
| − | <b>Dedication Perks</b> are passive bonuses that enhance your character stats or mechanics.<br>
| |
| − | They are always active once unlocked and are usually focused on consistency and overall performance.
| |
| − | | |
| − | It grants you increased damage on specific spells, cooldown reduction and defensive bonuses.
| |
| − | | |
| − | <b>Revelation Perks</b> are stronger and more impactful upgrades.<br>
| |
| − | Some high level spells require a Revelation Perk to be used.
| |
| − | | |
| − | It grants you new mechanics, enhance spells significantly and provide powerful situational effects.
| |
| − | | |
| − | == Playstyle Customization ==
| |
| − | The Wheel of Destiny allows you to adapt your build depending on your objective:
| |
| − | | |
| − | <b>Hunting:</b> AoE damage, sustain or mobility.
| |
| − | | |
| − | <b>Bossing:</b> single target damage, survivability or burst damage
| |
| − | | |
| − | <b>PvP:</b> utility, crowd control or defensive mechanics
| |
| − | | |
| − | You can switch between builds anytime by resetting your points in a protection zone.
| |
| − | | |
| − | == Gem Atelier ==
| |
| − | The Gem Atelier is an extension of the Wheel of Destiny that allows you to further customize your character by socketing **Gems** into the wheel domains.
| |
| − | | |
| − | Each of the four quadrants of the Wheel of Destiny contains a specific socket where gems can be placed to unlock additional stats, resistances, or spell modifiers.
| |
| − | | |
| − | [[file:gem atelier interface.png]]
| |
| − | | |
| − | === Gem Types & Quality ===
| |
| − | Gems come in different types matching the core vocations and can have three quality tiers:
| |
| − | * '''Lesser Gems:''' Provide basic stat bonuses or basic resistances.
| |
| − | * '''Regular Gems:''' Offer stronger stats and can grant minor combat perks.
| |
| − | * '''Greater Gems:''' The most powerful gems, granting unique modifiers to high-level spells or special mechanics.
| |
| − | | |
| − | === Revealing Gems ===
| |
| − | When you drop or obtain a raw gem, it comes unrevealed. You must use the Gem Atelier interface to reveal its properties. The bonuses rolled on a gem are random within its quality tier, meaning you might need to find several gems to get the perfect rolls for your build.
| |
| − | | |
| − | == Fragment Workshop ==
| |
| − | The Fragment Workshop is where you upgrade your gems and expand your character's power limit. By using **Character Fragments** and gold/resources, you can permanently upgrade your overall gem effectiveness.
| |
| | | | |
| − | === Modifying and Upgrading ===
| + | [[file:Gem Atelier Icon.gif]] [[Gem Atelier]]<br> |
| − | * '''Enhancing Fragments:''' You can upgrade specific combat fragments to increase the base stats they provide when rolled on a gem.
| + | Houses active gems tailored to your vocation, allowing fluid build adaptation depending on your hunting, bossing, or PvP goals. |
| − | * '''Leveling Up Tier Perks:** Higher workshop levels unlock advanced synergy bonuses, making your socketed gems even more impactful.
| |
| | | | |
| − | Planning your Wheel of Destiny nodes along with your active Gem Atelier sockets is crucial to maximizing your character's potential!
| + | [[file:Fragment Workshop Icon.gif]] [[Fragment Workshop]]<br> |
| | + | Permanently increases the stat floors, rolls, and synergy thresholds of your entire gem collection by recycling unwanted loot. |
Idioma/Language:


The Wheel of Destiny is a character progression system that allows players to spend points to unlock powerful perks and even unique spells.
It allows you to specialize your character for different playstyles such as hunting, bossing or PvP.
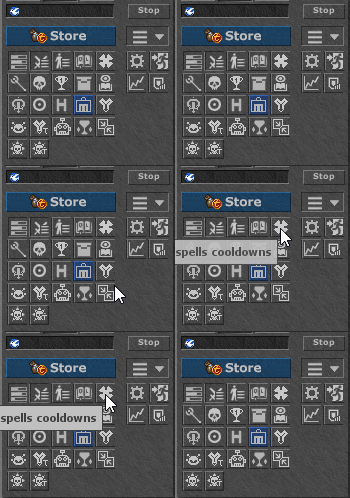
To open the Wheel of Destiny, click on this button:
To achieve peak efficiency, character progression relies on a continuous loop between three major systems:
 Wheel of Destiny
Earns promotion Points through leveling to clear paths toward major Vessel perks and unlock physical Gem Sockets.
 Gem Atelier
Houses active gems tailored to your vocation, allowing fluid build adaptation depending on your hunting, bossing, or PvP goals.
 Fragment Workshop
Permanently increases the stat floors, rolls, and synergy thresholds of your entire gem collection by recycling unwanted loot.

 Wheel of Destiny
 Gem Atelier
 Fragment Workshop